How Can We Help?
The main portion of the Noor footer is a widgetized section that can display widgets in 1- 4 columns. Widgets add various content or features to your site. They can be added, removed, and rearranged in the Appearance > Widgets tab on your WordPress admin panel.
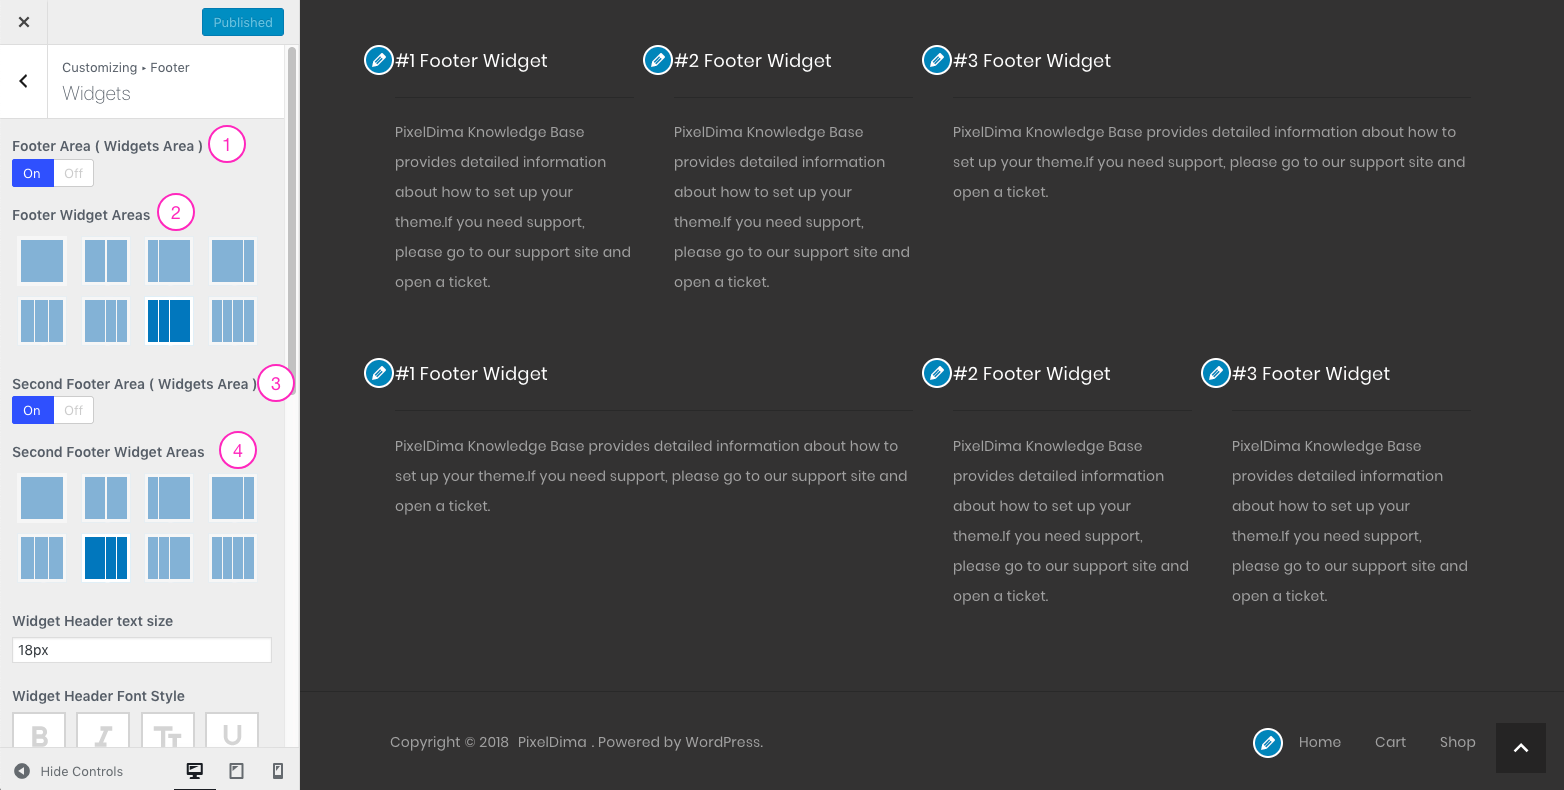
- First, make sure that you’ve enabled footer Area on your site. Switch the Footer Area option to On.
- Choose the Widgets area columns layout.
- If you want an extra widgets area with a different layout, switch the Second Footer Area option to On.
- Choose the Widgets area columns layout for the Second Footer Area.
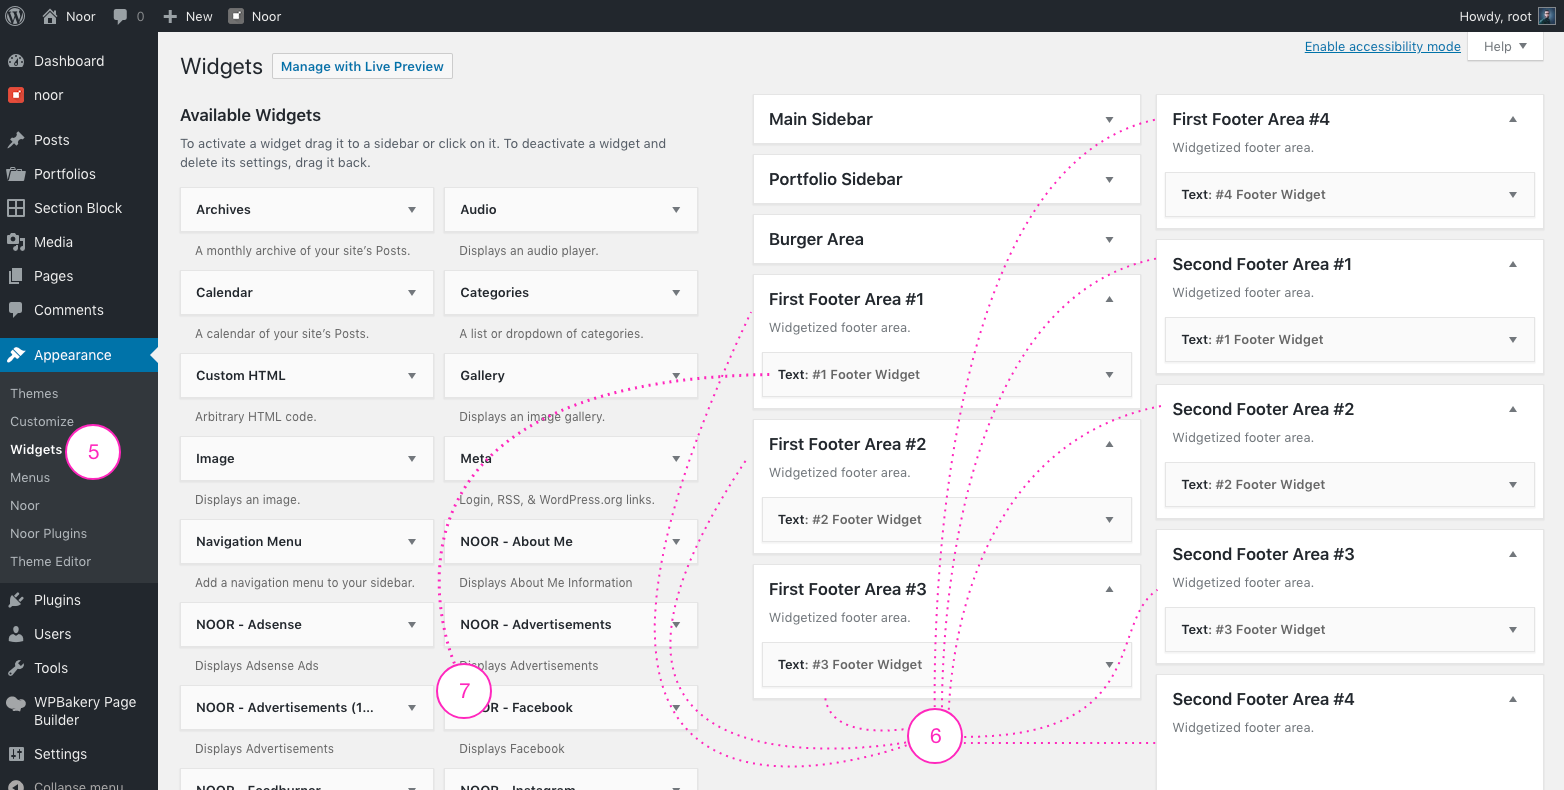
5- Navigate to Appearance > Widgets to access the widgets and footer widget sections.
6- You will see the First Footer Area #X section on the right-hand side for each footer column in the First Footer Widgets Area and Second Footer Area #X for each footer column in the Second Footer Widgets Area.
7- On the left-hand side are your widgets, simply drag and drop the widgets you want from the left side into the Footer Widget sections on the right side.