How Can We Help?
Noor includes the most famous and most powerful slider in the Revolution Slider. Using Noor combined with Revolution Slider you can create limitless unique animations for your site.
For instructions on how to use this slider and other useful links, we have collected them in a list below:
Overview
Resources
- Revolution Slider Documentation — The documentation is online and accessible to everyone.
- Purchase Revolution Slider — to get support, auto-updates and premium sliders (read the note above).
- Create/Import Your First Slider — Let’s get started by creating your first slide.
- Get Free Templates — Download free available templates, then import them manually to the Revolution Slider.
Plugin Updates
The Revolution Slider plugin is a Noor bundled plugin it can be updated after we release a new update of Noor. The update notification will be visible and can be accessed via the WordPress Dashboard > Plugins section.
For more you can check this article: How To Update The Premium Plugins
How To Create A New Slider Revolution Slider
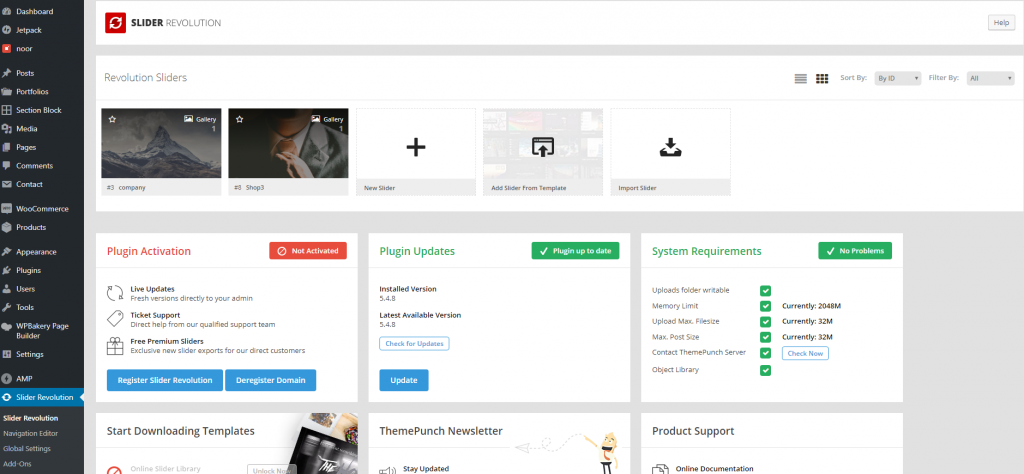
Step 1 – Click on the ‘Slider Revolution’ tab on your WP admin sidebar. Once on this tab, click the ‘New Slider‘ button.
Step 2 – Select the content source type from the 1st section called ‘Content Source’. If you choose ‘Post-Based Slider’ or Specific Posts, please refer to the Slider Revolution Docs for information on how to set up Content Source types.
Step 3 – Insert a slider name and alias from the 2nd section called ‘Slider Title & Shortcode’. The alias text will generate a shortcode that can be used in the editing field of pages or posts.
Step 4 – Select a layout in the 3rd section called ‘Select a Slider Type’ and each type will have its own settings. Once you’ve selected a Slider Type, you can also choose to load a preset from that Slider Type.
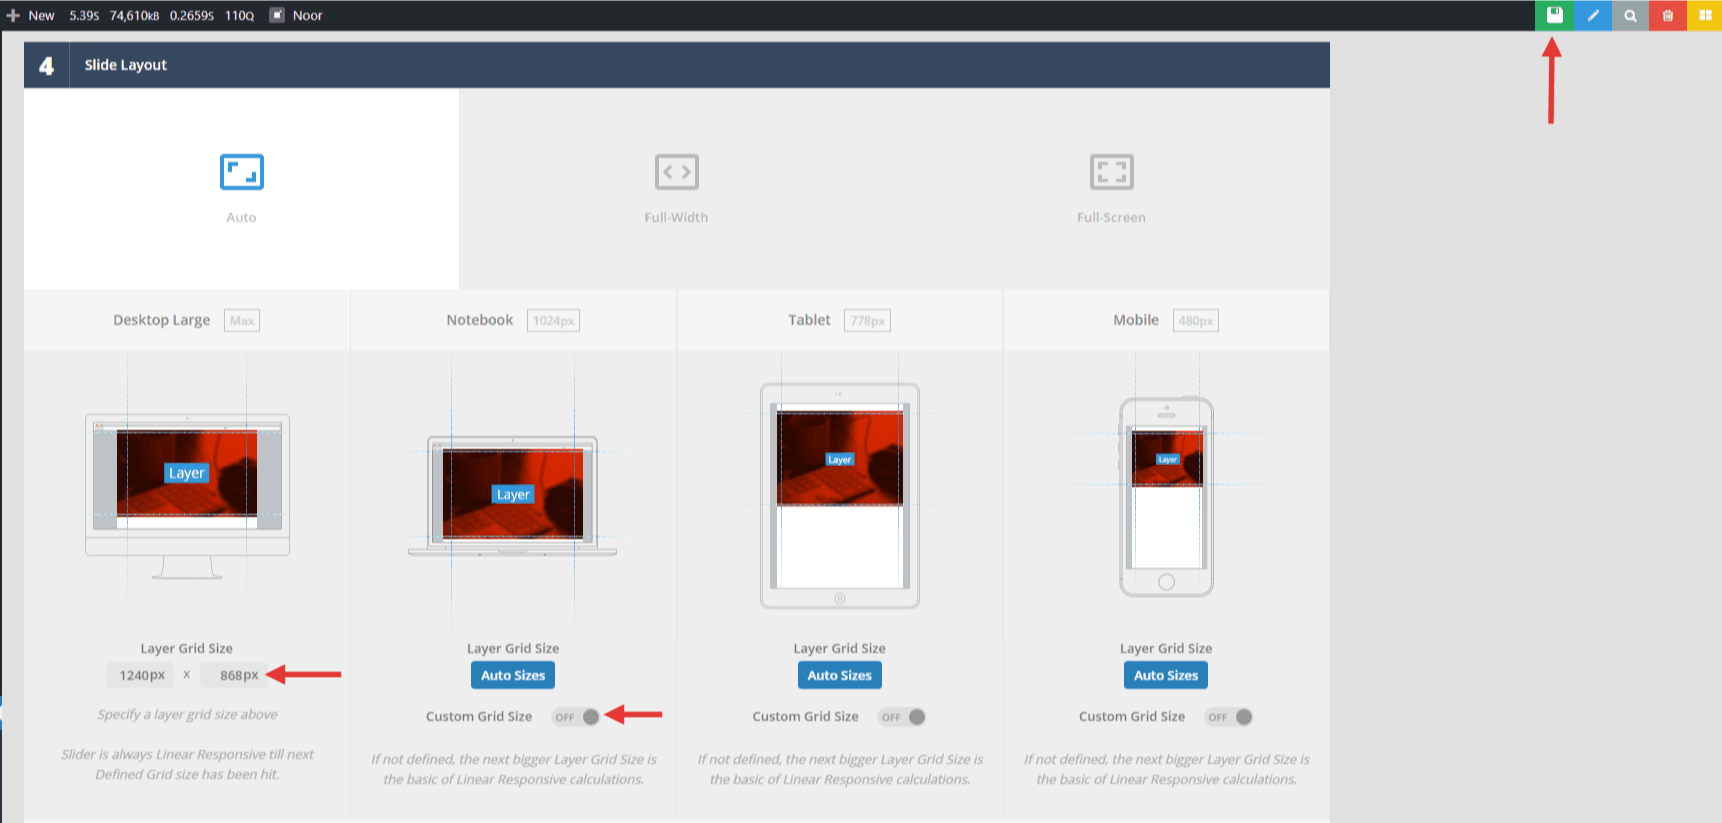
Step 5 – Set the layout and resolution settings from the 4th section called ‘Slide Layout’. Here, you can set different heights and widths for your slider when viewed on different mobile screens or viewports.
Step 6 – On the right hand side, you’ll find many more options you can set for you slider, such as General, Layout & Visual, Navigation, etc. Each option will have a self-explanatory description, so feel free to explore each tab and test the options out.
Step 7 – Once you are done, click the green ‘Save Settings’ button at the very bottom of the page, or the green save icon on the top of the screen.
How To Add Slides To Your Slider
Step 1 – Go to the Slider Revolution tab on your WP admin sidebar and select the Slider you’d like to add slides to from the Slider Revolution section.
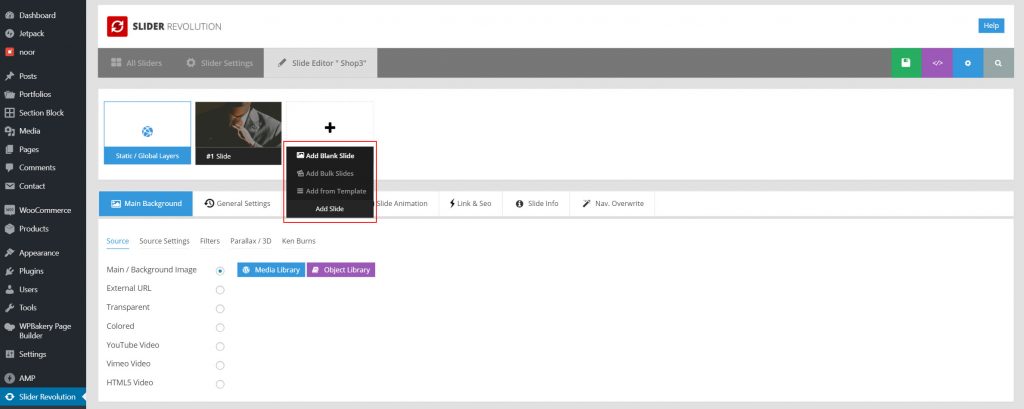
Step 2 – Hover over the ‘Add Slide’ button and select the type of slide you’d like to add. Once selected, it will create a new blank slide.
Step 3 – You can change the title of your new slide by hovering on it, and clicking the name field. Enter your new name, then click the pencil icon right beside it to save your new slider name.
Step 4 – Before you reach the Slide Editor, you’ll find additional tabs that allows you to set the slide’s Main Background, General Settings, Thumbnail, Slide Animation, Link & SEO, etc. We won’t go into detail on what each option in these tabs do, but please feel free to check out each option.
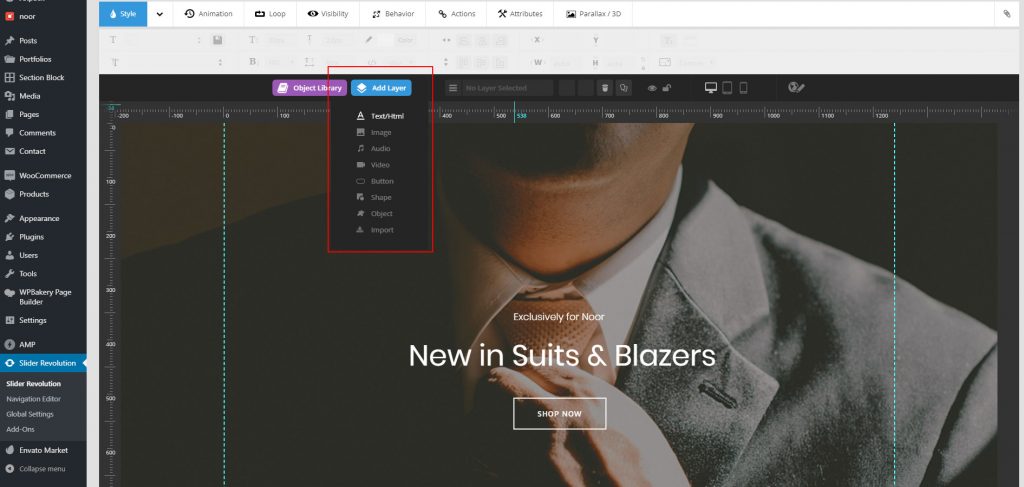
Step 5 – Below the page is the Slide Editor. To add a new layer, hover over the blue ‘Add Layer’ button on the top left side of the canvas and select which type of layer you’d like to add. You can add a Text/HTML layer, an Image layer, a Video layer, a Button layer, a Shape layer, etc.
Step 6 – Once you add a layer, You can customize it further by using the tabs on top of the canvas. These tabs are the Style tab, Animation tab, Loop tab, Visibility tab, Behaviour tab, etc. We won’t go into detail on what each option in these tabs do, but feel free to check out each option.
Step 7 – You can switch to and from layers using the dropdown beside the ‘Add Layer’ button. On this toolbar, you’ll also find the image icon, resize icon, delete icon and duplicate icon.
Step 8 – If you enable the ‘Custom Grid Size’ options under the ‘Slide Layout’ section in the Slider Settings, you’ll also find viewport icons where you can change between viewports and adjust how the slider is displayed on each.
Step 9 – Below the canvas is the Animation Timeline. Here, you can see all the layers you currently have. You can rearrange layers here, and you can also click the Play button to Preview the slide’s animations.

Step 10 – Once finished, click the green save icon on the upper right part of the screen. Keep repeating this process for any new slides you’d like to create.
How To Add Slider into a Page
Assigning a slider via Page Builder will place the slider in a different position on the page. In addition, Noor offers an option to position an assigned slider via Dima Page Settings below the header, and the header can be set to be transparent.
Please read this article for more details Adding Slider into a page.