How Can We Help?
Noor supports custom WordPress menus, with multiple levels of dropdown support for the main menu. There are 5 areas of the theme where you can assign a menu. These are Primary Navigation, Icon Navigation, Burger Navigation, Footer Navigation, and AMP Navigation. Each of these menu locations can have a custom menu assigned to them.
Once a menu is created and assigned to the location, it will be used on the frontend for those specified areas. There are also several Options to customize the menu. Please see below for more details.
Noor Offers 5 Different Menu Locations
- Primary Navigation – This is the Main Menu that shows in the Header area.
- Icon Navigation – This is the Icon Secondary (optionally) Menu that shows in the Header area with Icon style.
- Burger Navigation – This is the menu optionally if you want to use the burger menu
- Footer Navigation– This is the Menu that will be used in the Small Footer area in your 404 pages, as seen here.
- AMP Navigation – This is the menu that will be used when viewing on AMP mobile devices.
Noor Menus Have Several Options
Noor also offers several theme options to customize the menu. They are located in the Customize > Header. From there, the Theme Options will be organized under more specific areas. When styling your various menu locations, the settings will be here.
How To Setup A New Menu
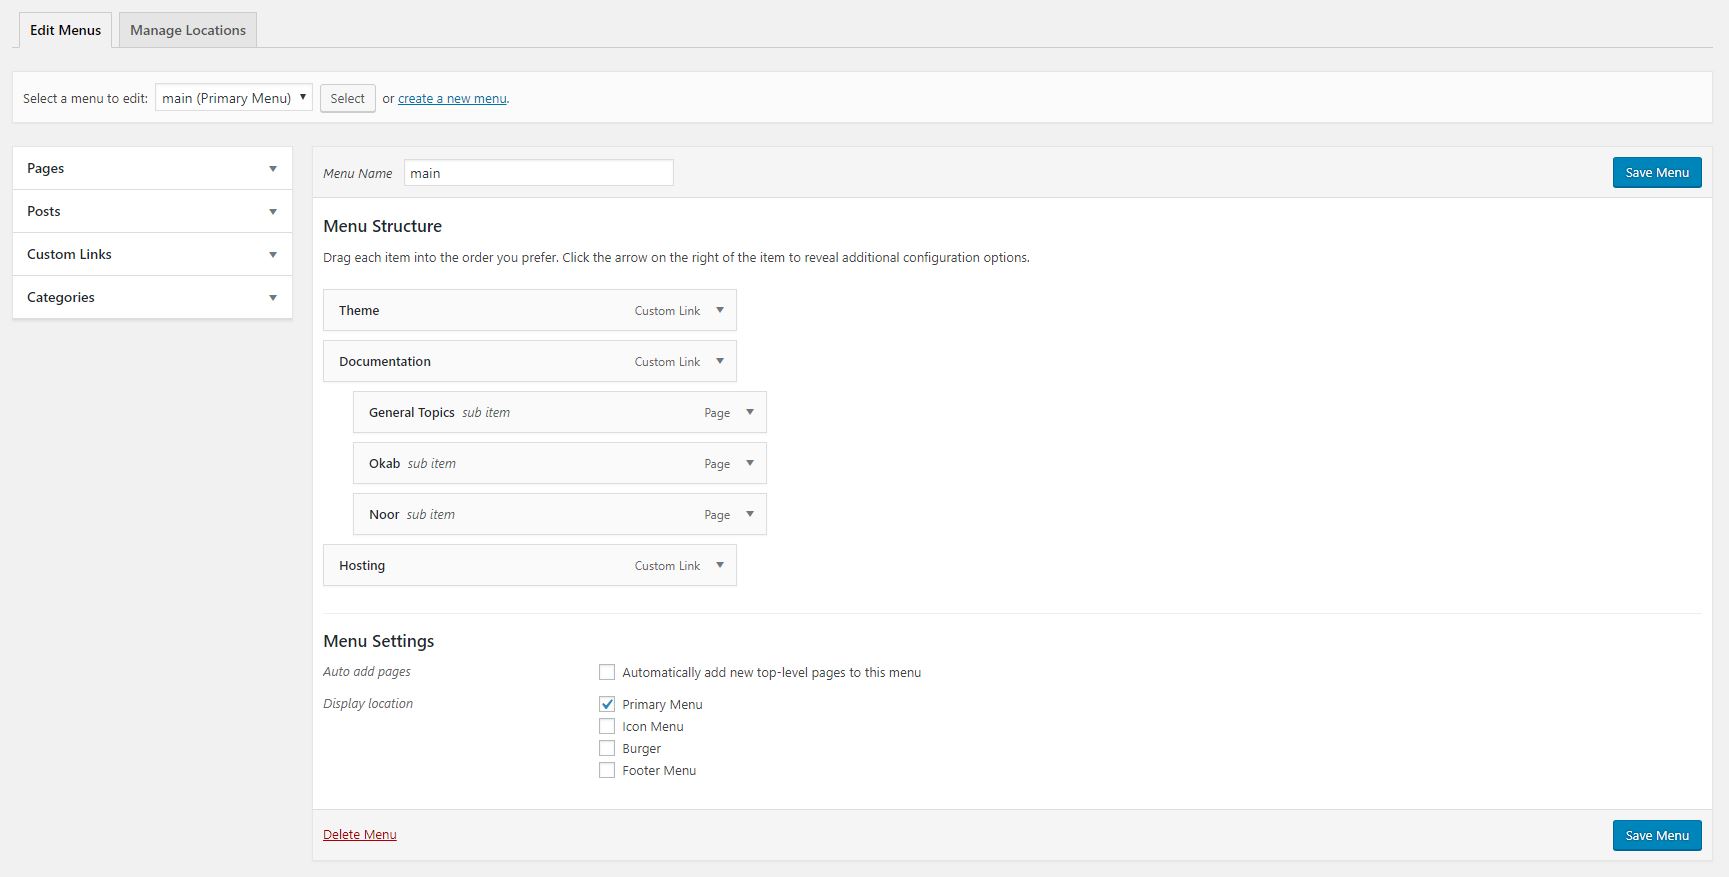
Step 1 – Navigate to the Appearance > Menus section of your admin sidebar.
Step 2 – Click the Create A New Menu link and enter the desired menu name. To save the menu name, click the Create Menu button.
Step 3 – To add a menu item, select one of your created pages on the left-hand side and click the Add to Menu button. You can also add all kinds of different posts from the left side.
Step 4 – To add a custom menu item, click the “Custom Links” menu item bar, then enter a custom name and URL into the respective text fields and click “Add to Menu.”
Step 5 – Manage your menus by using the drag and drop functionality. To create a drop-down menu, simply drag a menu item below and slightly to the right of another menu item and it will lock into place. That will set the menu item as child item and automatically appear as a drop-down menu item.
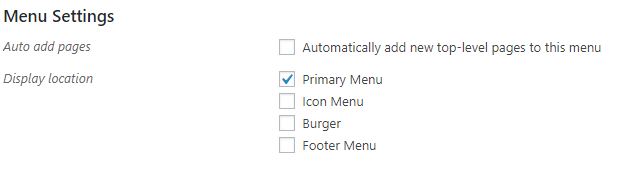
Step 6 – After setting up your menu, scroll down to the bottom of the page to assign the menu to one of the 5 locations in the Theme Locations box.
Step 7 – Once its all done, make sure you click the Save button.
How to set up different menus on a per page basis
Sometimes more than one menu at the main menu location is needed for a complex site (Multi-landing pages or One-Page). The most likely case is, when you want to have a one-page site with a parallax scrolling menu (see here for further information: Setup One Page) as a landing page, but also a full site at the same time. Since the one-page site part uses menu anchors for scrolling it will need a different menu than the rest of the site, that will use normal links.
The menu you want to use on almost all pages of your site can be set up simply as it is shown above. Assign it to the main menu location, and you are done. The second menu, that was specially created for the one-page site part, is not assigned to a special location in the menu setting. In order to assign it to your special page, follow these two steps:
Step 1 – Open your page’s edit screen. If you have not created it so far, navigate to the Pages section of your admin, and click the Add New option.
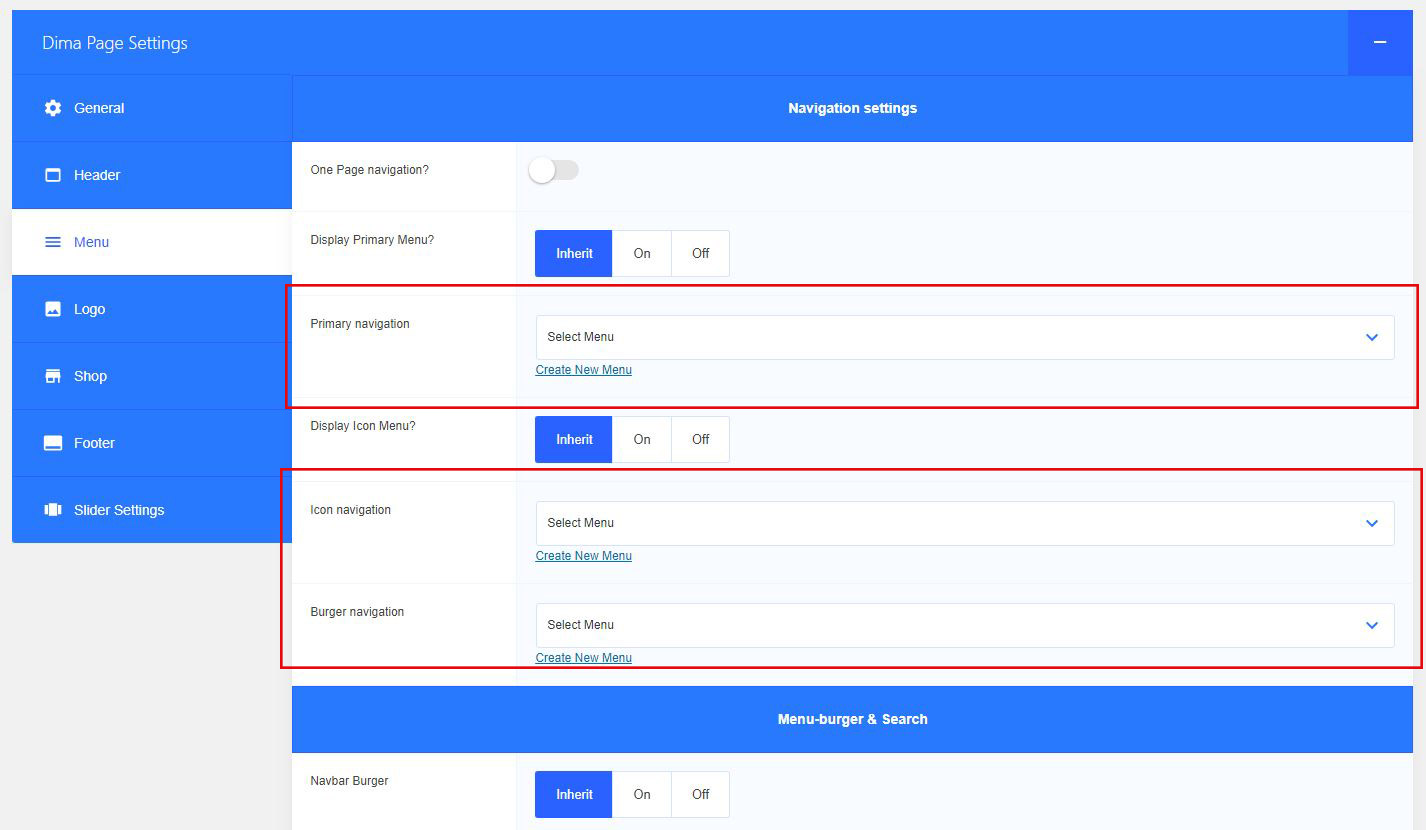
Step 2 – Scroll down to find the Dima Page Settings box, and open menu tab and find the Primary Navigation Menu dropdown and choose your newly created menu for the one-page site part from above. Save the page.