How Can We Help?
Noor has built-in mega menu that can be enabled on every First Level menu item in Appearance > Menus tab. It can have 1-6 columns, custom column padding, background image, Font Awesome icons or SVG icons next to menu items and much more. Please see below for information on how to set the mega menu up. If you need information on how to create a regular menu, please read our Setting Up The Menu article
How To Create A Mega Menu
Step 1 – Navigate to the Appearance > Menus section of your admin sidebar and select ‘Create A New Menu’ link to create a new menu, or edit an existing one.
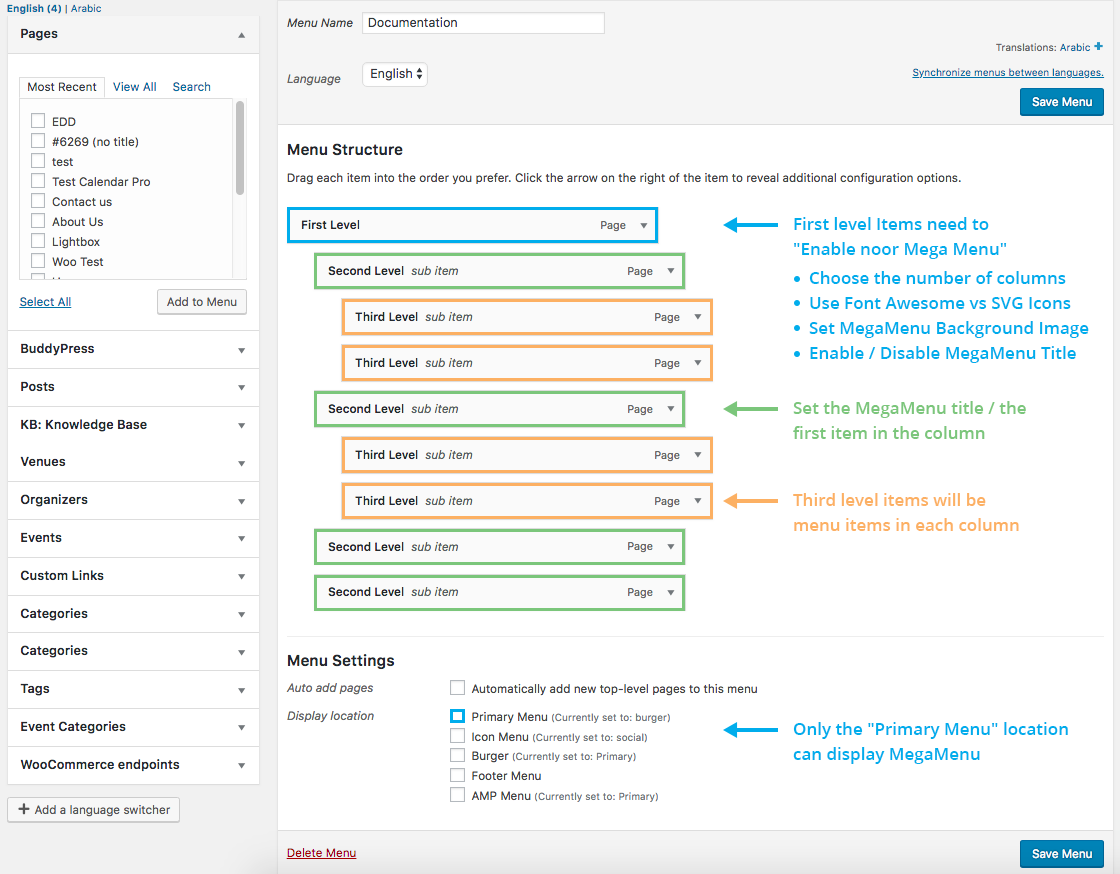
Step 2 – Only first level menu items have the Noor Mega Menu On/Off. To enable the Noor Mega Menu, check Enable Noor Mega Menu.
Step 3 – Set the ‘Mega Menu Columns’ option that will determine how many columns will be displayed.
Step 4 – Set the ‘Masonry Menu’ option that will use the masonry layout.
Step 5 – Each menu item can have an SVG Icon or Font Awesome icon along with the menu text. There are two separate options where you can select your Font Awesome icon or SVG icon.
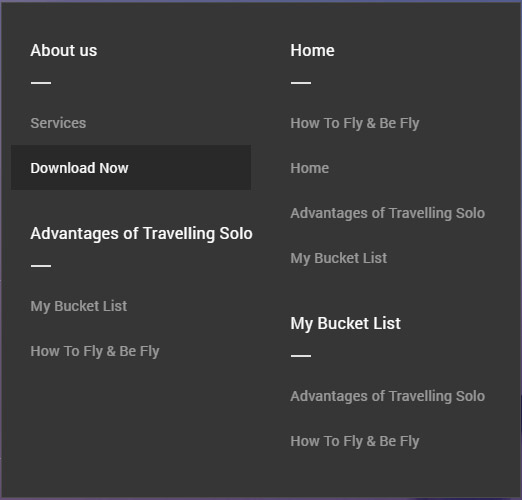
Step 6 – Second Level menu items will display as a title for columns if you have “Mega-Menu Title” active. To add a Second Level item inside the Mega Menu, select a custom link on the left-hand side and click the ‘Add to Menu’ button. To make it a Second Level menu item, drag the menu item below and to the right of the First Level menu item.
Step 7 – The Third Level menu items will be the smaller menu items in each column. To add a Third Level menu item, repeat step 5 above and drag and drop the new menu item below and to the right of the Second Level menu item.
Step 8 – After setting up your menu, scroll down to the bottom of the page to the Menu Settings section. Check the ‘Primary Menu’ checkbox to assign your new menu as the primary navigation. Please reference the image below for more details. Only the Main Navigation will display the Mega Menu.